How
to Make an E-Collar
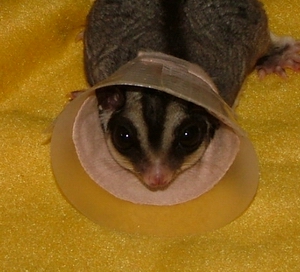
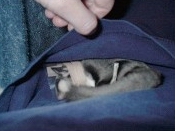
My
Gizmo wearing an E-Collar after being
neutered
Deep
Appreciation is given to Jen Bailey (GC's Xfilefan) for
these illustrated directions
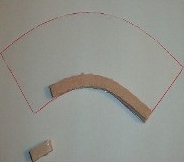
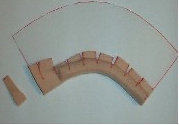
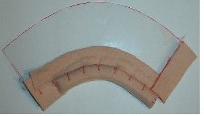
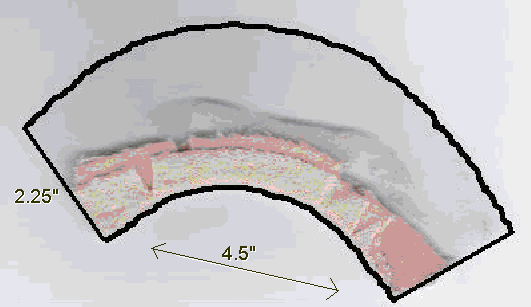
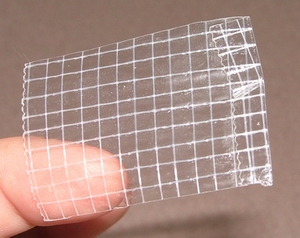
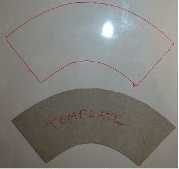 Step 1: Trace template
onto clear plastic notebook cover, then cut out.
Step 1: Trace template
onto clear plastic notebook cover, then cut out.
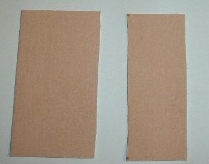
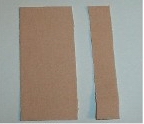
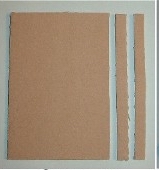 Step 2: 1 sheet Dr. Scholl's Molefoam: cut 2 strips ¼” along long edge.
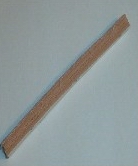
Step 3: Remove one adhesive
strip and stick one on top of another leaving one adhesive
strip for later.
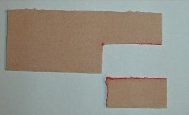
 Step 4: Cut ¾”off of dual layer molefoam- remove backing and adhere to
clear plastic as shown.
Step 4: Cut ¾”off of dual layer molefoam- remove backing and adhere to
clear plastic as shown.
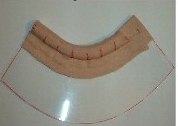
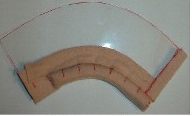
 Step 5: 1 sheet Dr. Scholl's Moleskin- cut a strip 1-3/8” wide down length
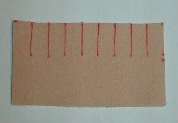 Step 6: Cut slits ½” deep at ½” intervals down length
 Step 7: Turn collar over, molefoam side down. Remove backing from moleskin.
Affix uncut edge to collar- about ¼” of it
Step 7: Turn collar over, molefoam side down. Remove backing from moleskin.
Affix uncut edge to collar- about ¼” of it
 Step 8: From the middle of moleskin-
wrap around over molefoam, maintaining contours. Trim excess
moleskin from edge.
Step 8: From the middle of moleskin-
wrap around over molefoam, maintaining contours. Trim excess
moleskin from edge.
 Step 9: Cut 1/2” strip from moleskin
 Step 10: Remove backing and adhere over
slitted mole skin.
Step 10: Remove backing and adhere over
slitted mole skin.
 Step 11: Cut 1 strip 1-3/4” long X 5/8” wide
 Step 12: Remove backing and place on
edge of collar
Step 12: Remove backing and place on
edge of collar
 Step 13: Wrap around edge of
collar
Step 13: Wrap around edge of
collar
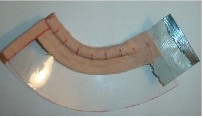 Step 14: Apply a small amount of duct
tape, Fold a small amount of duct tape over to make a tab
for easy removal.
Step 14: Apply a small amount of duct
tape, Fold a small amount of duct tape over to make a tab
for easy removal.

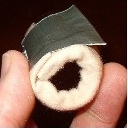

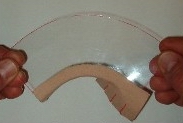
These photos show the finished e-collar...
 Step 1: Cut a strip of duct
tape about 1.5" wide, then fold 1/4" over and stick to
itself, making a tab for easy removal. Set this piece aside
(I stick just a bit of it to the edge of my kitchen
counter). Then, cut another strip of duct tape about 1"
wide, then fold 1/4" over and stick to itself. Set this
piece aside also.
Step 1: Cut a strip of duct
tape about 1.5" wide, then fold 1/4" over and stick to
itself, making a tab for easy removal. Set this piece aside
(I stick just a bit of it to the edge of my kitchen
counter). Then, cut another strip of duct tape about 1"
wide, then fold 1/4" over and stick to itself. Set this
piece aside also.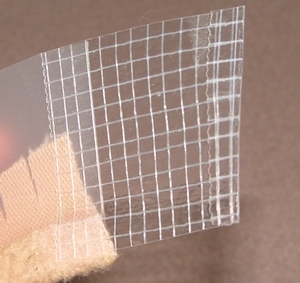 Step 2: Place 1.5" wide strip
of duct tape along edge of E-Collar, as shown, keeping
folded over tab exposed at unattached end.
Step 2: Place 1.5" wide strip
of duct tape along edge of E-Collar, as shown, keeping
folded over tab exposed at unattached end.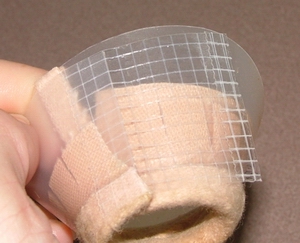 Step 3: Having an assistant
hold glider securely, wrap E-Collar around glider's neck,
overlapping edges of collar, then stick the duct tape to the
overlapped edge, rubbing down along duct tape to ensure
secure attachment of tape.
Step 3: Having an assistant
hold glider securely, wrap E-Collar around glider's neck,
overlapping edges of collar, then stick the duct tape to the
overlapped edge, rubbing down along duct tape to ensure
secure attachment of tape.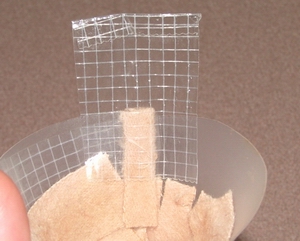 Step 4: Attach 1" strip of
duct tape to inside of collar about half-way down
length, as shown, keeping folded over tab exposed at
unattached end.
Step 4: Attach 1" strip of
duct tape to inside of collar about half-way down
length, as shown, keeping folded over tab exposed at
unattached end.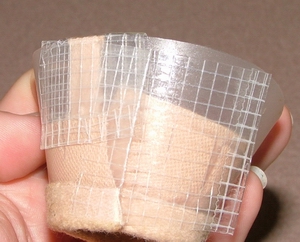 Step 5: Fold duct tape over and
attach to outside of e-collar, rubbing down along duct
tape to ensure secure attachment of tape.
Step 5: Fold duct tape over and
attach to outside of e-collar, rubbing down along duct
tape to ensure secure attachment of tape.